| Home | Projects | Research | Misc. | Contact |
Java Native I/O
Example Using Eclipse
02-Jan-2021
This is an illustrated, step-by-step "Hello World" example to demonstrate the use of Java Native I/O plugin in Eclipse.
Add Library to Project
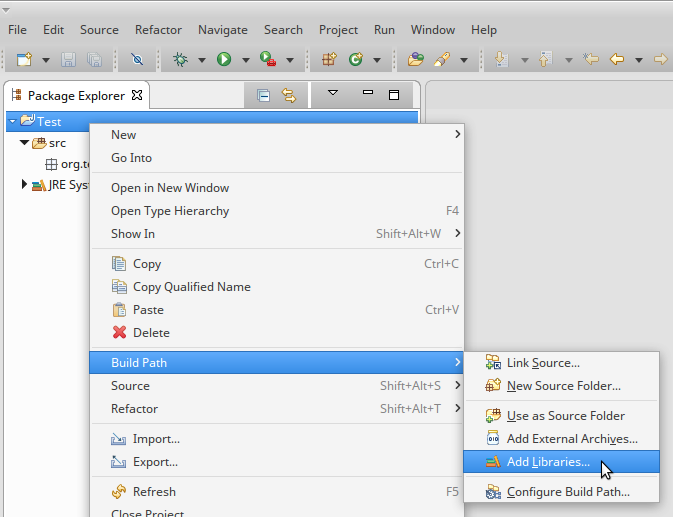
Go via context menu as displayed in the image below or via Project->Properties->Java Build Path, select the tab sheet Library, and click on Add Library.
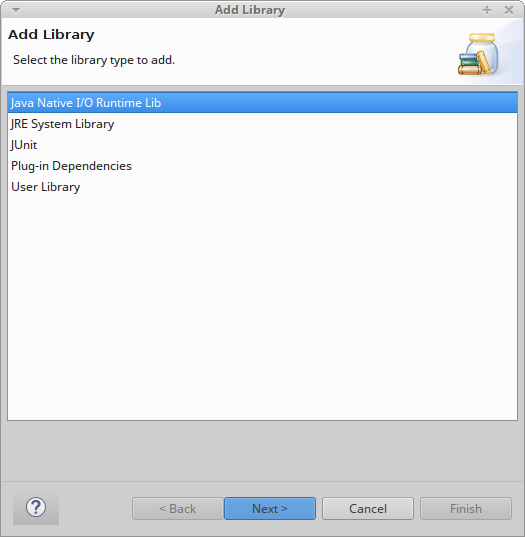
It will open a dialog, which lists all available libraries. There, you select the Java Native I/O Runtime Lib and then click Next and Finish.
Declare Struct(s) as Java Class(es)
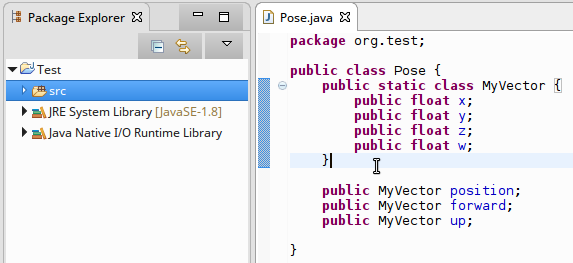
Write a simple class with no inheritance and public members only to describe the structure of the data you want to read/write from/to byte buffers.
Create Native I/O View
Open the context menu on your class in the Package Explorer (right click on the java file, here Pose.java) and select Create Java Native I/O View to create a view class.
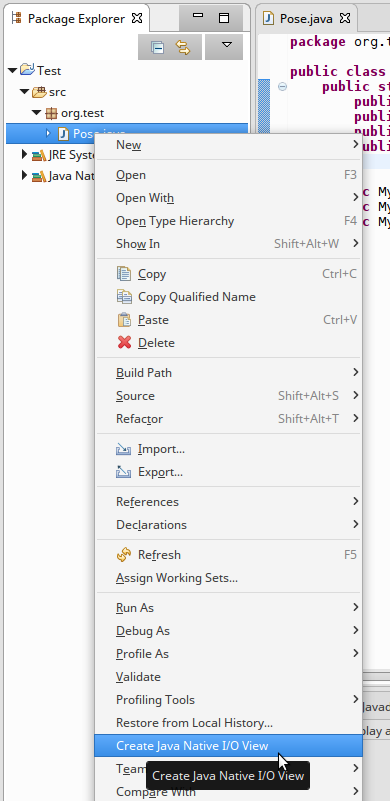
It will create a new class PoseView in a sub-package of org.cakelab.nio.view.generated. This class contains the code to access the data in the buffer according to the declaration given in class Pose.
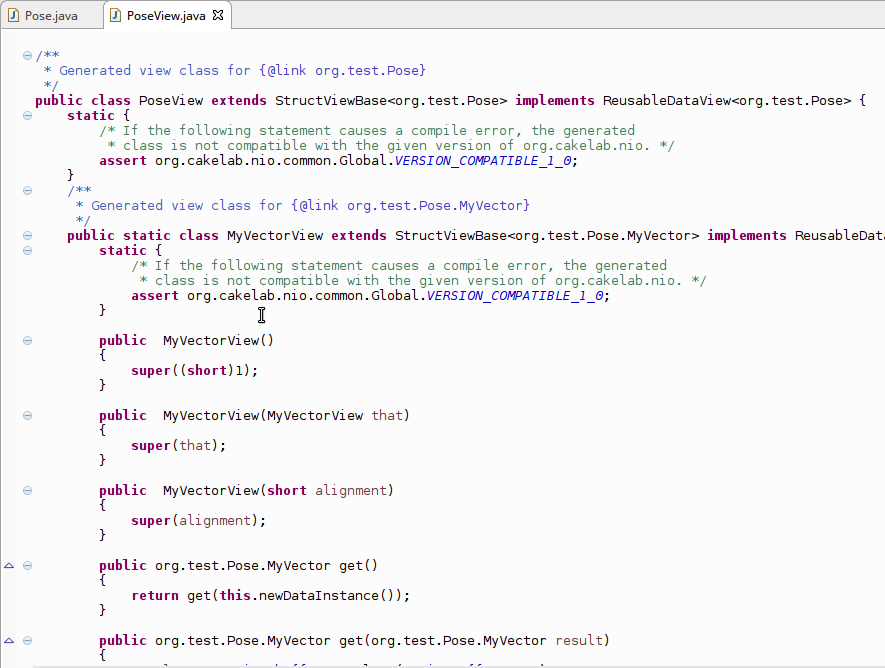
Its your class from now on and you can do whatever you want with it (extend, refactor, etc.).
Using the Data View
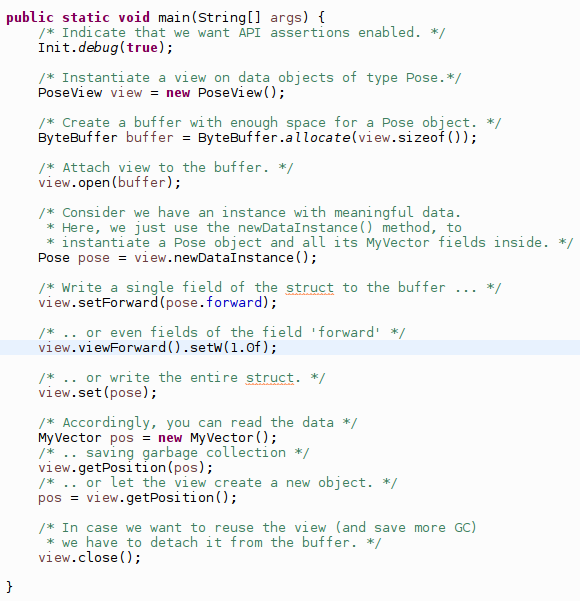
The following code snippet demonstrates read and write capabilities of the view.
